The Junkers
Ju-88 A-5 was a multitask warplane which entered service in time to participate
on the “Blitz”, and went on soldiering with the Luftwaffe on the principal theatres
of action during WWII. It appeared before the A-4 model. The A-5 featured the
fuselage of the A-1 coupled with extended wings and at some point, different
versions of the famous Jumo 211 power plant.
This
modelling experience started with a nice little surprise. ICM chose to pack the
256 plastic parts supplied inside a very sturdy cardboard box. The very nice
box cover was printed separately in glossy cardboard and covered the top and
sides of the main box. This approach ensured a perfect protection of the
plastic components of the kit against the adventures of transit and handling of
such a box. On the same tone, the 20 clear plastic parts were protected inside
a separate plastic bag and the decal sheet, which catered for four colour
options was also well protected.
Upon the
examination of the plastic parts and the consultation of several reference
sources and internet sites, several shortcomings of this kit became apparent.
One of the major criticism to this kit was the inaccurate cockpit floor, which
lacked a very noticeable raised platform. There is already a correction resin
kit for it, available from AIMS products, but it was decided to make the most
of the kit parts, coupled with Eduard photo-etched metal details and home-made
details. At the end of the day, and with the canopy attached, this modeller can
live with that easily. On the same tone, there were several panel lines that
needed correction, as well as several sink marks on the fuselage surface.
Neither of these glitches are deal-breakers. They were corrected with ease and
without spending much time.
To address
some glitches and to enhance even further the already good plastic parts,
Eduard 49750 interior and 48876 exterior photo etched frets were employed were
deemed necessary or advantageous.

Before glue
was committed to plastic, the instructions were scrutinised and compared with
the Eduard instructions sheets. This step was very important, as it allowed for
a concise and workable build sequence including both plastic and photo etched
detail parts.
Before
the application of RLM 66 Schwartzgrau, the cockpit was embellished with
Eduard`s photo-etched metal parts.

The
radiator faces were detailed with photo-etched mesh and surface details. These
catered for a shortcoming of the kit.

In
order to enhance the scale effect, the exhaust stacks were drilled open.

The landing
gear legs also received some attention from the Eduard PE fret. In addition,
small disks of styrene were produced with a punch&die set and used to
detail the kit parts.


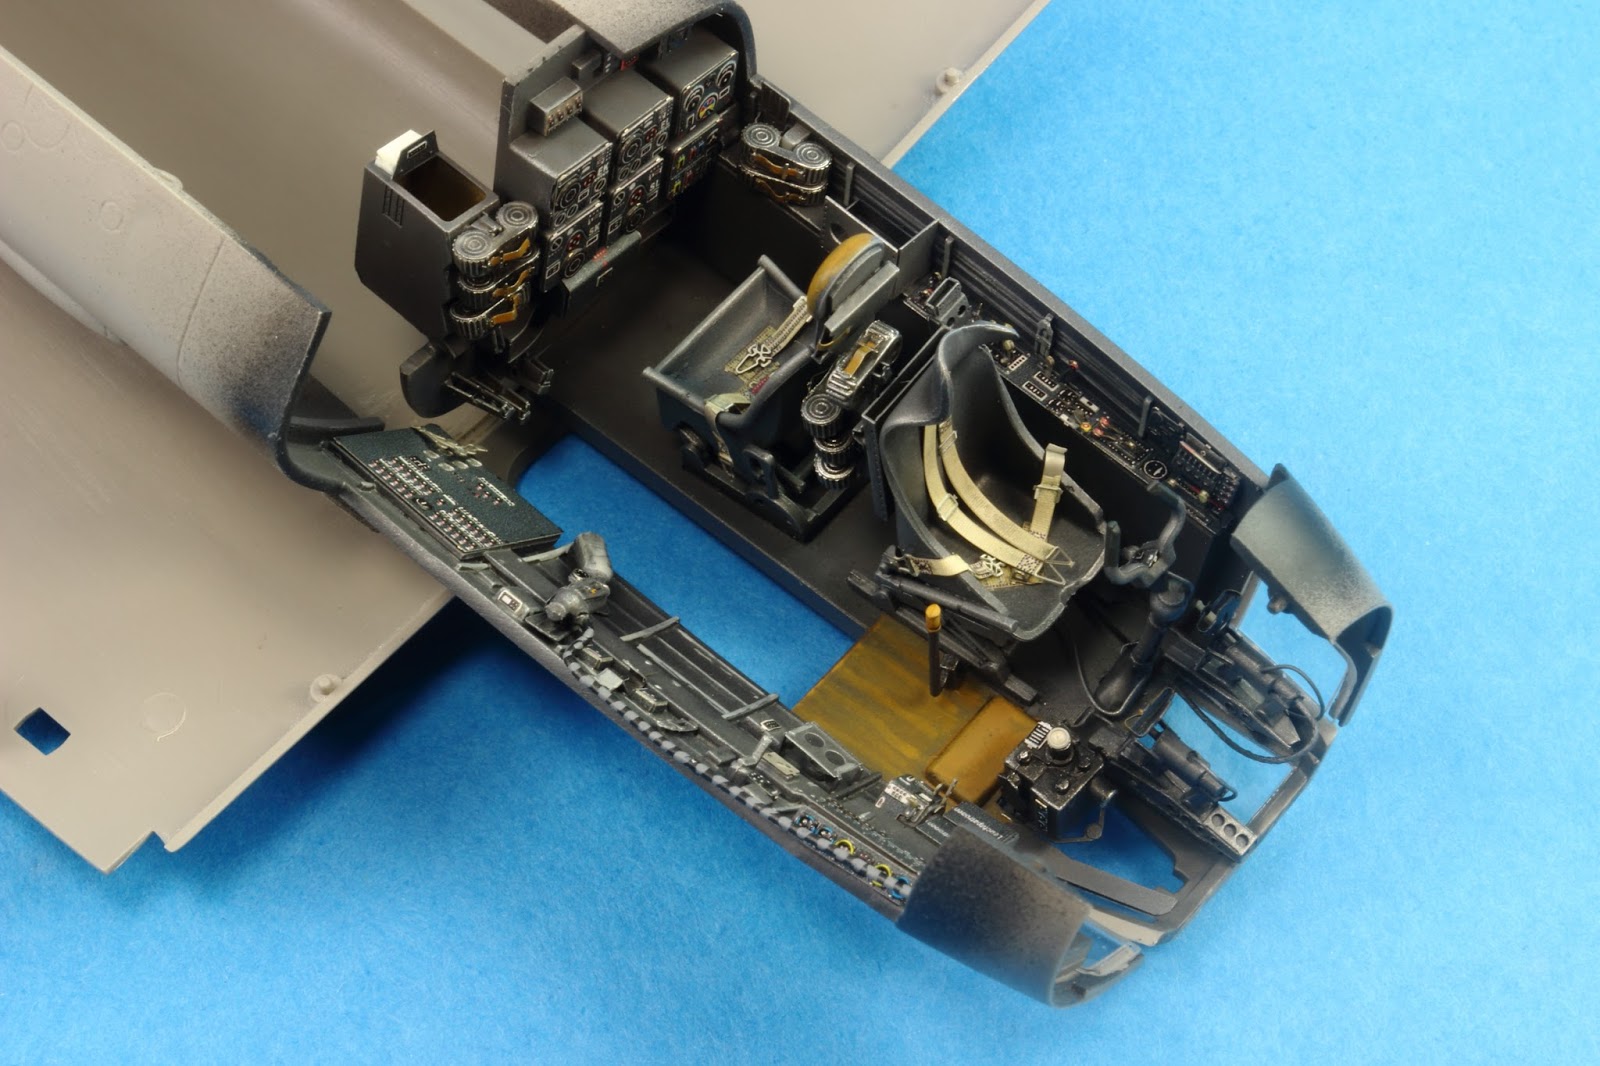
The cockpit
parts were given a black primer coat followed by RLM 66 Schwartzgrau. A lighter
shade of this colour was sprayed on several panels to add interest.

The
complete cockpit with plastic, photo-etched and scratch built pieces surely looks
busy:

The ventral
gondola was detailed with plastic pieces and wire. Sadly, the inner masks were
forgotten inside the model. One can only pretend they`re curtains…

The engines
and both nacelles were detailed with photo etched parts and sections of plastic
and hypodermic needles.


The wing to
fuselage seam only needed a smear of Mr. Surfacer 500 later cleaned up with a
cotton bud damp in Tamiya Lacquer thinner.

Priority
was given to the joint between upper wing half and fuselage. The gap that
resulted between both wing halves was far easier to fill with superglue and
sand to shape.

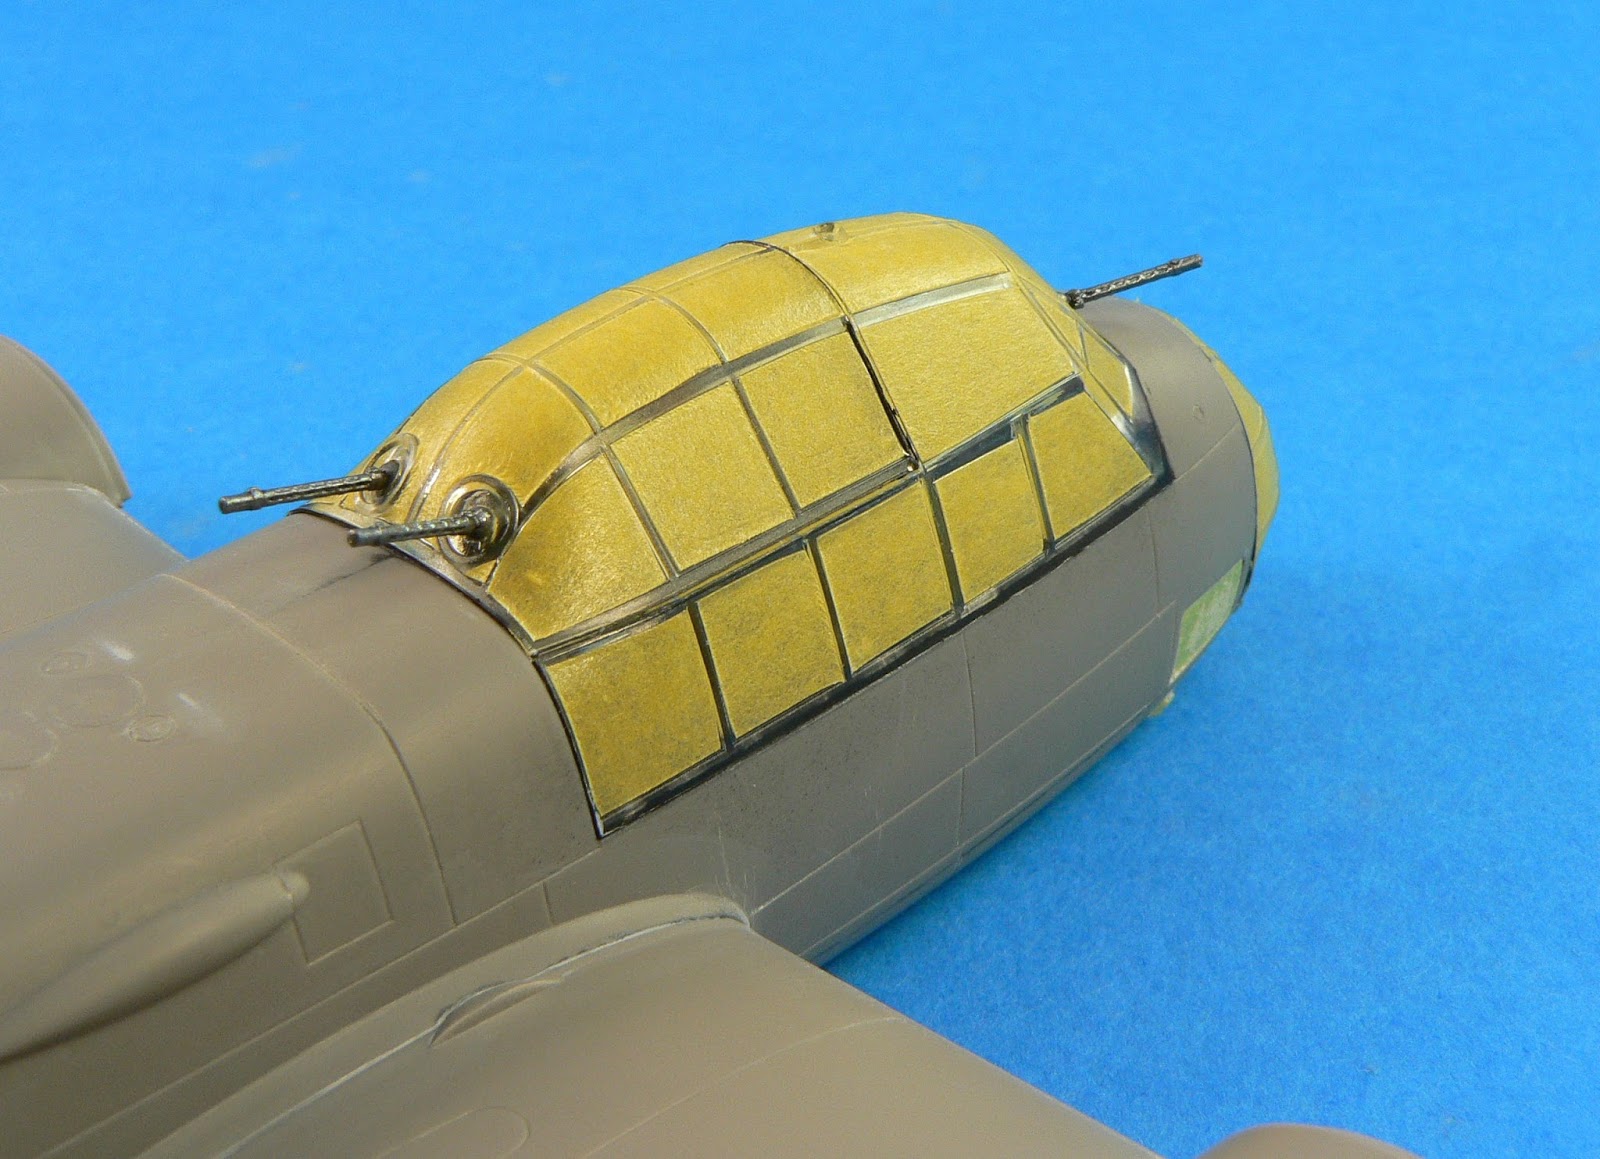
The fit of
the clear parts was very good. Note the MG`s already in place. Strangely they
survived until the end of the build.
The
engines were painted black, the details picked up with various acrylic paints
and the edges drybrushed with Oily Steel.

Some care
was needed with the engine nacelles. Sink marks had to be treated and the hot
air exhaust ducts removed and drilled to backdate them for the earlier A-1
style present on the A-5 airframes.


The starboard
engine nacelle proved very problematic. The top panel was skinned with 10thou
plasticard and the edges filled with Mr. Dissolved Putty. All this was sanded
and feathered to shape with various grades of sanding paper.

The canopy frames were first painted with RLM 66 before the main colour was
applied. Note the engine nacelles with the surfaces regularized.

Vallejo Model Air 71255 RLM65 was used on the undersides. The paint
was applied highly diluted to allow the black primer to show through.


On the upper surfaces the first colour to be applied was Vallejo Model Air
71015 RLM 71 Dark Green. This was also applied in a way to permit the black to
show through.

Tamiya masking tape was used to define the areas that were painted RLM 70
black Green. Vallejo Model Air 71021 was the shade chosen.

The decals performed well under the usage of Micro Set and Sol
solutions. After allowing a couple of days for the decals to dry, the fuselage
was washed with soapy water and sealed with another gloss coat.


Ammo
from Mig Jimenez 1608 Dark Green Grey emphasised the panel lines on the upper
surfaces. Again, a flat brush made the cleaning work and created a nice patina.

Com.Art`s 21041 Old Oil and 20021 Transparent Smoke were mixed and
airbrushed on the main structural panel lines.


The oil dot filter technique was employed on the entire surface of the model.
Over a satin surface, oil paint dots were added and blended with a brush moist
on odourless white spirits.


Both exhaust gases and oil trails were replicated with oil paints. The colours
used were mainly Burnt Umber and Lamp Black.

Finished model


